What is Arduino?
Arduino is an open-source electronic tool that uses a combination of hardware and software. The Arduino board can perform the required functions by sending instructions from the microcontroller on the board. This can be achieved by using the Arduino programming language and the Arduino software (IDE).
Arduino finds application in everyday objects to complex scientific instruments. Arduino was designed by Ivrea Interaction Design Institute as an easy tool for fast prototyping, aimed at students without a background in electronics and programming.
Advantages of using Arduino
Arduino is a key tool to learn new things. Anyone – children, hobbyists, artists, programmers – can start tinkering just by following the step by step instructions of a kit, or sharing ideas online with other members of the Arduino community. Several other advantages of Arduino are:
- Inexpensive: Arduino boards are relatively inexpensive.
- Cross-platform: The Arduino Software (IDE) runs on Windows, Macintosh OSX, and Linux operating systems.
- Simple, clear programming environment: The Arduino IDE is easy to use for beginners and it is very flexible.
- Open source and extensible software: Arduino software is an open-source tool and can be extended by users.
- Open source and extensible hardware: Arduino board pins are published and experienced circuit designers can make their own design by extending and improving it.
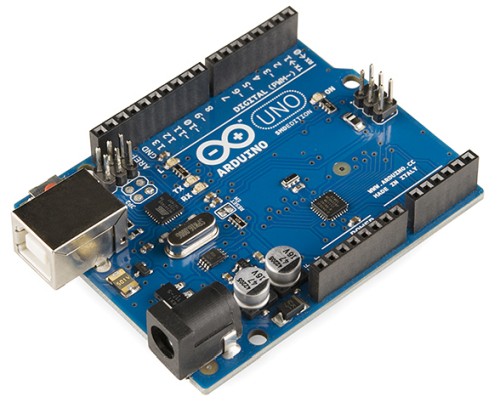
We start using the Arduino using the board named Arduino UNO.
The physical layout of Arduino UNO
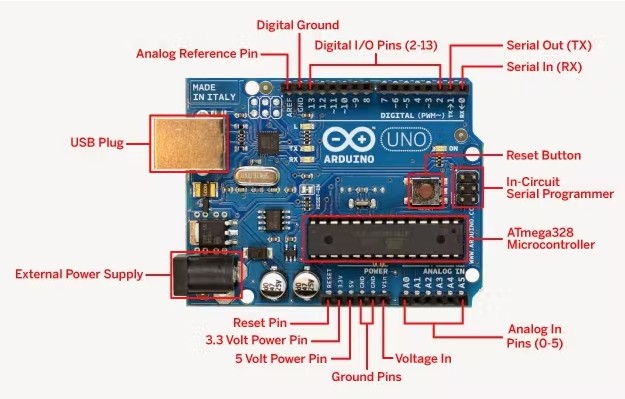
Components of Arduino UNO
- Microcontroller: The major component of the Arduino board is the microcontroller. The microcontroller is fabricated inside an integrated chip and it performs the arithmetic/logical operation required for the particular task. Also, it communicates with peripheral devices, reads input devices and writes to output devices. Arduino UNO uses an ATmega328P microcontroller.
- Digital I/O pins: For connecting the sensors/input devices and output devices the board has digital I/O pins (0-13). These pins are used either as input or as output based on the requirement. Pins 0 and 1 are used in serial communication where pin 0 is used for reception serial information and pin 1 is used for transmission.
- Analog input pins: Analog input pins (0-5) are used to give analogue inputs directly to the board.
- USB plug: USB plug for uploading the program and communicating with the computer. This also provides a power supply during the development stage of a project.
- External power supply: This is used to power the Arduino board when it is not connected to the computer.
- Board power supply pins: Used to provide power to peripheral devices.
- Reset button: A push button is used to reset the Arduino.
- In-circuit serial programmer
Installing Arduino IDE
- Download the latest Arduino integrated development environment (IDE) from the link https://www.arduino.cc/en/software .
- Click on the Arduino software.
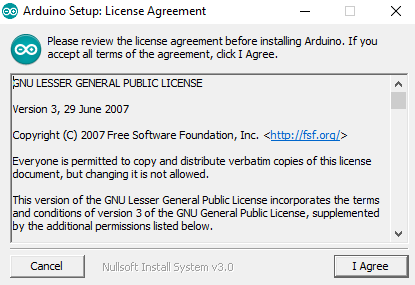
- Click on I agree
- Click on next
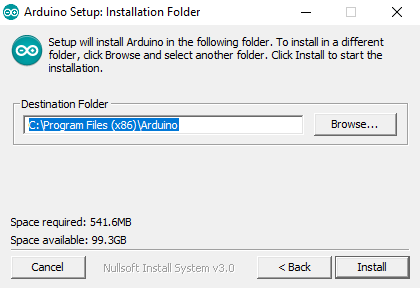
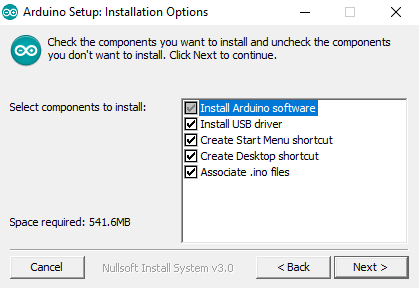
- Click on install. (If you want change in the destination folder, change to required destination and click install).
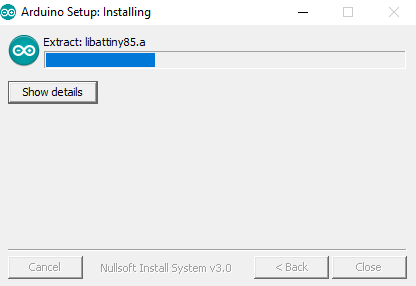
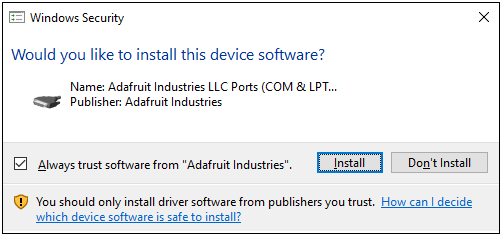
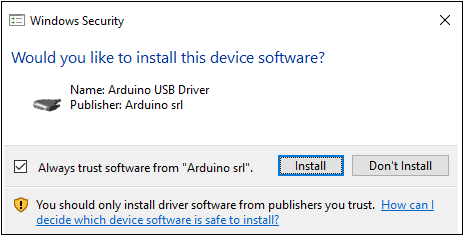
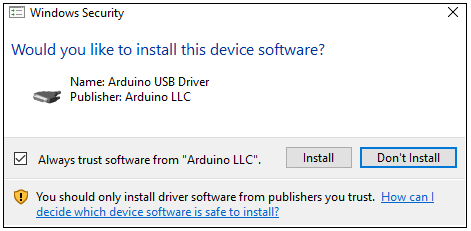
- Now installation will start and wait for the completion of installation. At the end of installation following dialogs will popup. Click on install button for all the three dialogs.
Connecting the Arduino UNO to the computer
Connect the Arduino board to the computer using a USB cable.
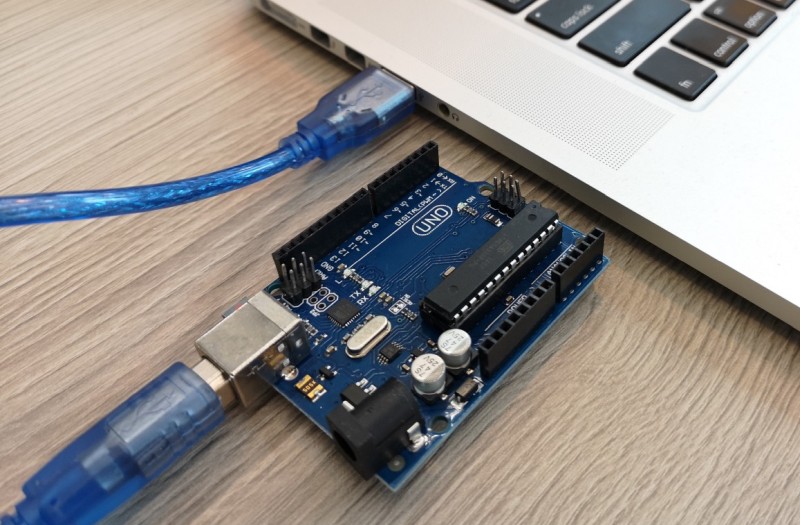
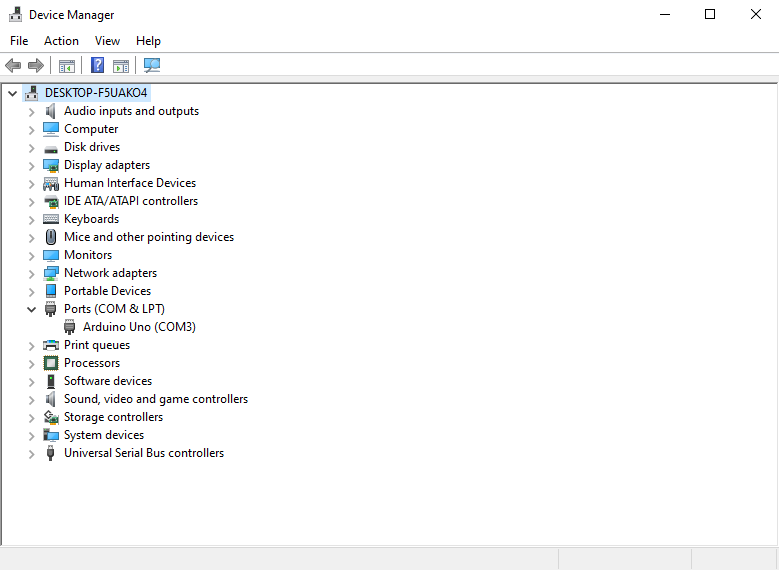
Now the Arduino board will be automatically detected. (The same can be verified using device manager).
Writing first Arduino sketch/program
Instruction writing to Arduino is done using the Arduino programming language. These programs are also called sketches. This section demonstrates how to write a simple Arduino program.
Required components:
- Arduino UNO board
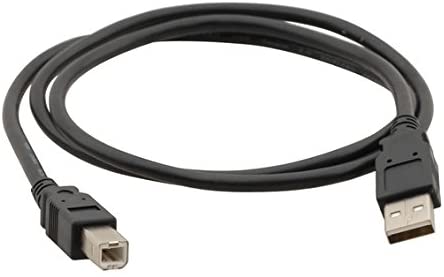
- USB cable provided with Arduino UNO board
Arduino UNO board contains a built-in LED. This LED is connected to pin digital pin 13.

Therefore the simplest task performed using the Arduino is bilking that LED for a particular interval of time.
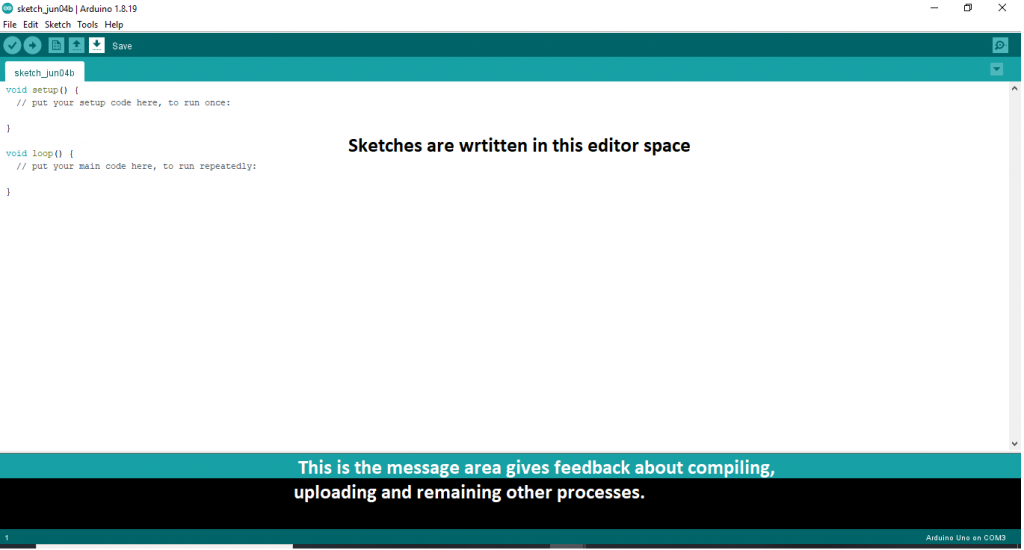
Arduino IDE visual appearance
Open the Arduino IDE. The following window is displayed having File, Edit, Sketch, Tools and Help options. It also has quick access buttons Verify, Upload, New, Open, Save and Serial monitor options. The editor space is provided to write the Arduino program. At the bottom, there is a message area which displays feedback of different processes performed on the sketch.
The following steps are performed to write and upload the new sketch.
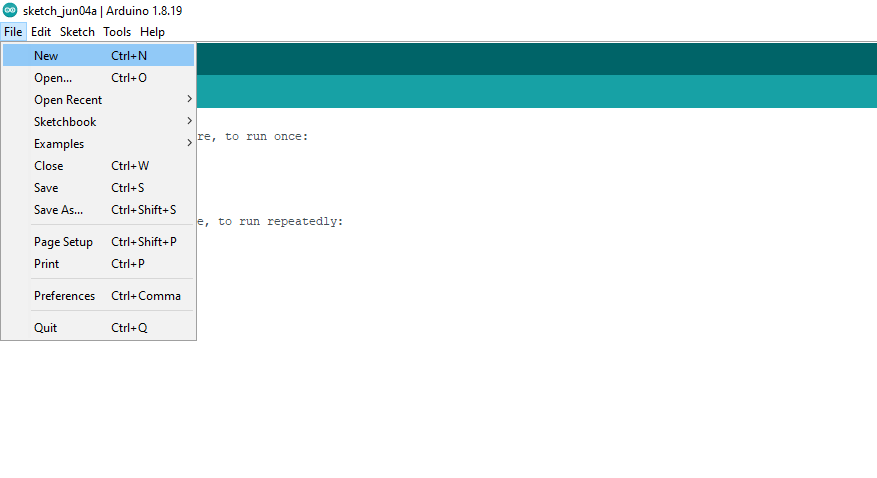
1. Writing the new sketch
To write a new sketch, go to File and click New (This can also be done using the New quick access button). This will create a blank sketch. Now write the Arduino program inside the sketch.
// the setup function runs once when you press reset or power the board
void setup() {
// initialize digital pin LED_BUILTIN as an output.
pinMode(LED_BUILTIN, OUTPUT);
}
// the loop function runs over and over again forever
void loop() {
digitalWrite(LED_BUILTIN, HIGH); // turn the LED on (HIGH is the voltage level)
delay(1000); // wait for a second. The delay given in terms of milliseconds
digitalWrite(LED_BUILTIN, LOW); // turn the LED off by making the voltage LOW
delay(1000); // wait for a second
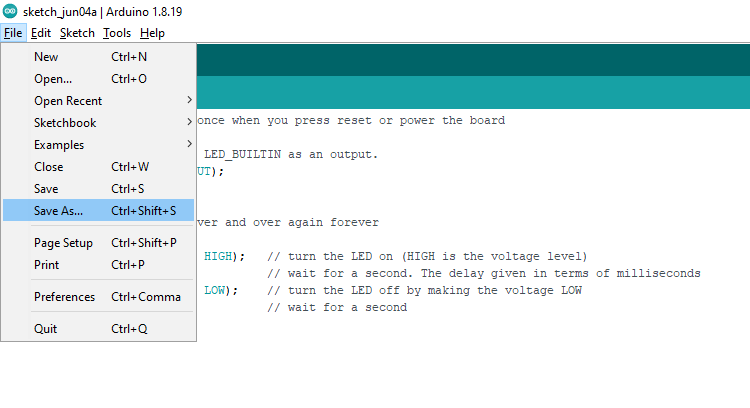
}2. Saving the Sketch
Now go to File and save the file with the required name (This can also be performed using quick access button Save).
3. Verifying (compiling) the sketch/Program
Compile the sketch by clicking verify button.
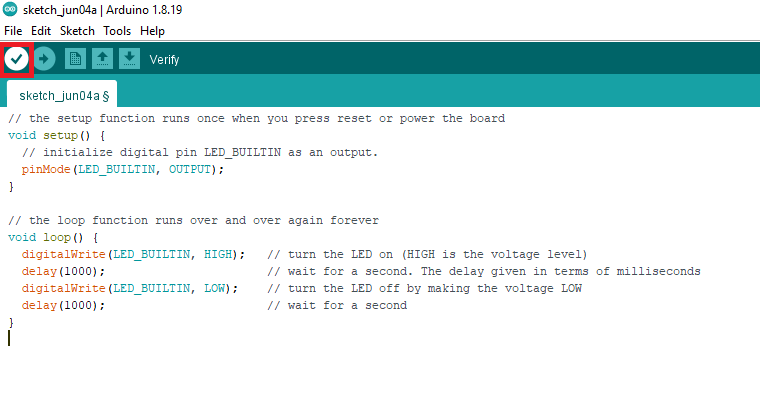
If the code gets compiled successfully, then the ‘Done compiling’ message will appear in the message area.

4. Uploading the sketch
The upload button compiles the sketch and uploads the program to the board.

If the code gets uploaded to the Arduino board successfully, then the ‘Done Uploading’ message will appear in the message area.

Now you can see the LED blinking for 1 second. Also, this can be re-verified for different values of delays.
Congratulations. You have successfully installed Arduino IDE and are ready to explore the Arduino projects.
Buy Original Arduino Uno R3 ATmega328P with USB Cable

Buy Starter Kit based on original Arduino UNO board 30+ DIY Projects for beginners with Video tutorials

Buy IDUINO SMD UNO R3 Board ATmega328P Compatible with Arduino SMD Uno Cable